Oh hello again! Long time no see, I know I know. I am awful. I've got to get better! But new year, new goals right?
I've got a very special project I am working on and will share all the details later but here is a little teaser of some of the fabrics I am pulling together. Cute huh?
Stay Tuned!
Tuesday, January 27, 2015
Coral + Turquoise: Fabrics to Inspire
Labels:
color way,
coral,
custom,
design,
fabric,
feather,
floral,
flower,
geometric,
graphic,
interior,
interior design,
interior designer,
interiors,
memphis interior design,
memphis interior designer,
pink,
retro,
turquoise
Monday, July 14, 2014
Outdoor Revamp
One of our major "To-Do's" in our 'new' house is our yard. With an acre and a half we have loads of potential which means loads of work. We have ideas but are doing a little at a time. One aspect I knew I wanted to tackle first was to freshen up the patio furniture we currently have. They were looking a bit tired and dingy, so I found some great outdoor fabric at fabric.com and got to work. (Well it actually took me a few months to "get to work" once the fabric came in, but such is life.)
Here are the before's of the dining chairs. This set was my sweet Memaw's so they are very special to me! I loved the fabric that was on it, but it definitely ran it's course.
And now for the After's:
I Love how they turned out! So bright and cheery. My Mom is teaching me how to sew, so this were a great little project to start with.
Someone approves! (He never sat in them when they were old and yucky! Ha!)
Hopefully the Mosquito's will let up soon so we can enjoy them!
Tuesday, May 27, 2014
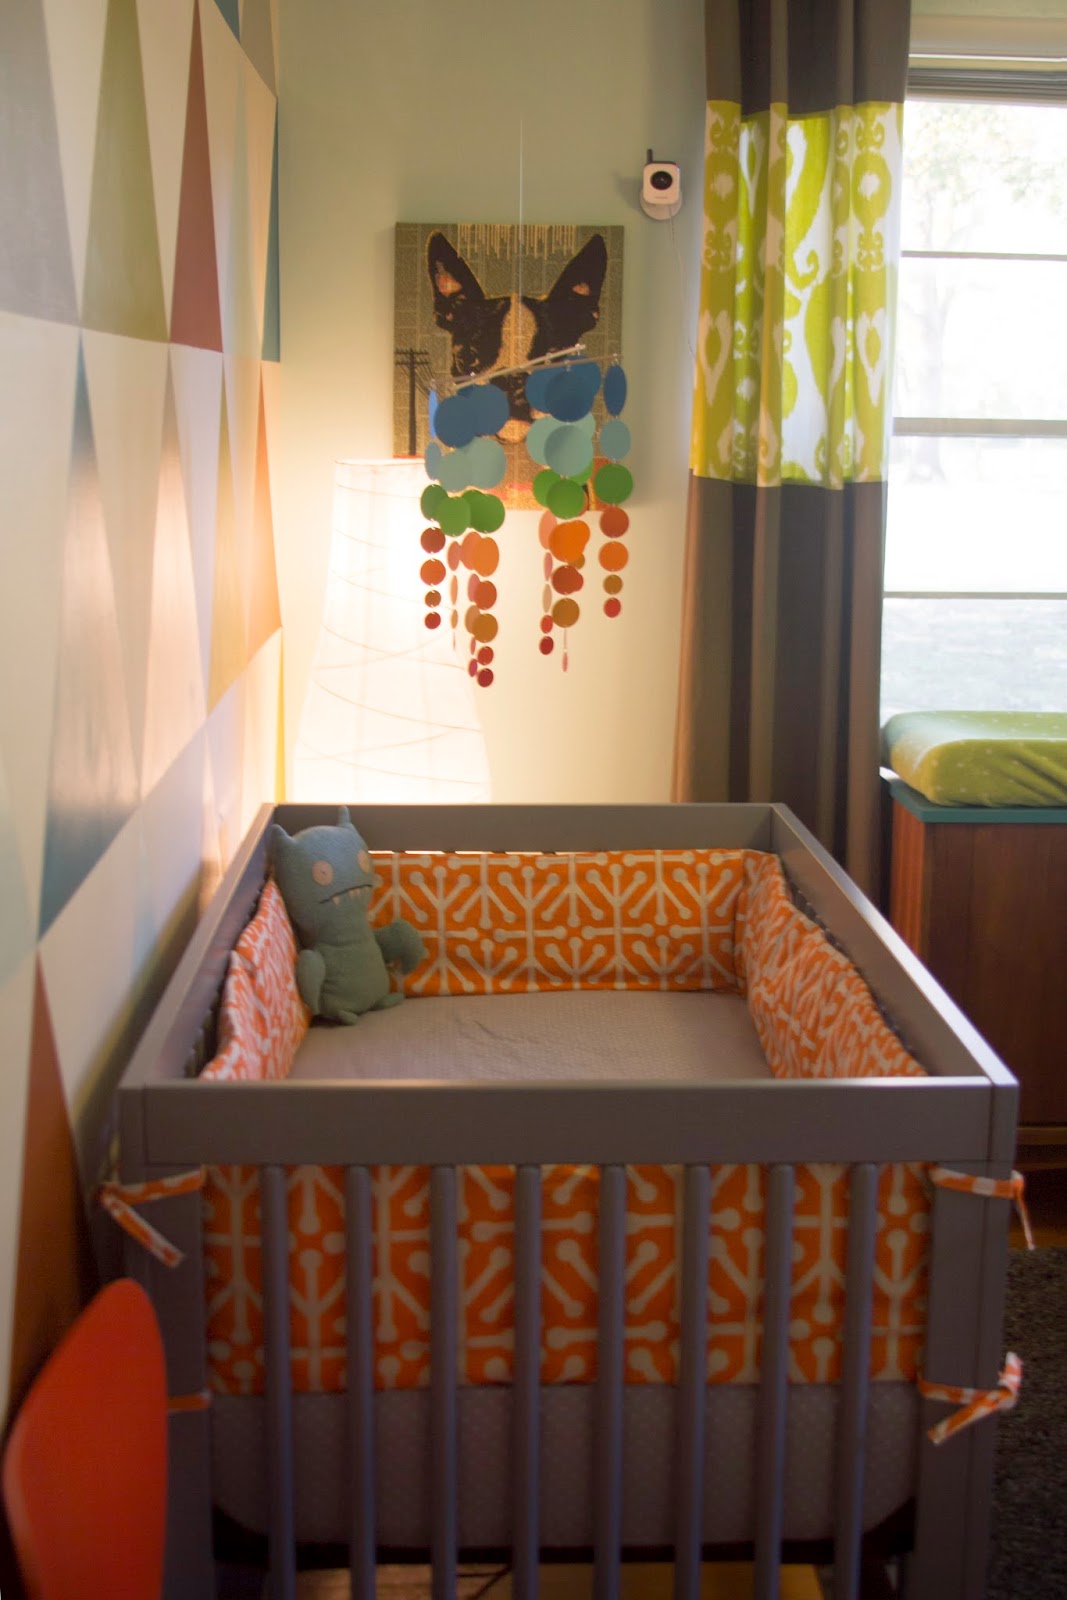
Levi's Nursery
This was my little design layout I came up with once I decided on the accent wall design and my fabrics. I also used it to brainstorm the color placement and where to put the fabrics I wanted to use.
So here's the plan....
I love our crib. Its retro and modern and the color is perfect. The wall was not as hard as it looks! Here are some process pics...
The hardest part was determining the size of the triangles and drawing it out. After that I simply would tape off one color group at a time, paint them, and let them dry before going after the next group. It took about 2 evenings of work. The result was so worth it.
We got the rocker from Ikea. Its modern yet super comfy. We with the the white cushion and once again my super Mom stepped in and covered the existing cushion with our fabric. (seriously, what would I do without her?!)

The mobile was a kit we got off of Etsy.
How cool is this "diaper cake"?! Once again, thank Mom.
The bottom prints are from a great artist, Elouise Renouf from Nottingham, UK. Her work is very Mid Century and very cool. It was so hard to pick two!
The top print was created by my friends over at An Open Sketchbook. Suzanne and Edgar are uber talented designers and artists. Take a look at their work and you will be hooked. Suzanne was actually one of my professor's in design school! Here's a better picture from their site:
I love the idea of placing words of wisdom and good advice around him in his room. That inspired me to create a few pieces of my own, seen here below.
I love this space. Levi and I hang out in here everyday. I can't wait to watch him grow up in here.
And most importantly, Levi loves it too :)
Levi at 4.5 months
(Photos above by Pictures of Silver Photography)
Levi at 6 months!
Labels:
art,
Color,
furniture,
interior design,
interior designer,
levi,
mcm,
memphis,
memphis interior designer,
mid century modern,
modern,
modern interiors,
nursery,
nursery design,
repurpose,
reuse,
window treatments
Friday, March 21, 2014
My Master Bedroom: Before & After
Our master bedroom was similar to the other bedrooms in the house, not much wrong but needed some color, the rim needed painting, and a more contemporary fan were among my top priority changes for the space.
So here is the "Before":
And here are the "Afters":
Personally, I love dark walls. I know the thought of a dark color on that paint swatch is intimidating, but it gives so much opportunity for drama, light, and contrast. All these elements make for a space full of interest. And dark walls in the bedroom means a dark space for sleeping... and I love to sleep! It's a very warm and comforting space. Everything in the room was transferred over from our old room in NC except for that long, tall mirror which was left in our "new" house and was actually made by the owner. They had it hanging horizontally in the den but it did not work there with our new configuration and I've always wanted a nice full length mirror in the bedroom, this one just happens to be an overachiever! I plan to have the window panels re-worked soon so that they hang from below the trim to the floor but that will be down the road. Can't do it all at once!
The dresser, chest, and nightstand were Matt's parent's. "Vintage" Stanley Furniture. ;) My night stand is a thrifted little Mid-Century piece that I revamped but I still to photograph that one! We stained our bed a few years ago to make it work better with our other pieces. We also added a more modern fan that or baby loves to watch ;) and the lamps are from Target.
So here's what the floor plan looks like:
You can see that we have lots of lamps and chose to have no over head light when we picked our new fan. I find that one overhead light usually is not the best choice in a bedroom and much rather have the option of have all my lamps on for bright light or be more selective with my light sources for a dimmer setting at night.
This room is a bit bigger than our previous bedroom yet still on the smaller side in terms of a "Master". It is an older house though so it's to be expected. We plan to gut the bathroom (which is not pictures but is all pink!) as well as re-egineer the closet. We will work with what we have and push the space to it's full advantage. Stay tuned!
Friday, February 28, 2014
Armoire Lovin'
I stumbled upon this picture a few years ago and instantly fell in love with this idea. I'm a sucker for organization and throw furniture into the mix and I'm a goner. Just ask the husband :)
We don't have a dedicated space for an office, but we have all of our "office" stuff dispersed through out (printer, paper, stapler, books, tape, glue, utensils, etc.)
So I have been on the look out for an armoire to transform. I access our local resale pages on Facebook quite religiously and found one on there for a best offer. My budget was $50 (because i had just sold som clothes on there for that amount and figured I could just use that for my investment basically making it an even trade). So I offered $50 and she took it!
So here it is....
I am planning on changing out the hardware, leaving the exterior as is, painting the interior a fun color, adding a pull out shelf, a fabric pin board, and a chalk board.
Here are some more great inspiration pics I found on Pinterest.
{source: pinterest with no link ugh!}
I also stumbled upon this page from Better Homes and Gardens here. They have featured so many cute ways to reuse armoires in several different spaces of the home. I love the flexibility they offer and some creative solutions for all different uses. They create a great source of organization and conceal potential mess while looking beautiful on the outside. I love that most are painted on the outside and interior, just another element of fun they offer. Check them out....maybe they will inspire you to come up with a creative use of your own.
Subscribe to:
Posts (Atom)